When Revolut launched their Open API to Revolut for Business in May 2018, it was great news for the developer community. You were now able to integrate one of the best payment services within your app and offer a seamless payment experience to your users.
But as it happens with any new open API, the official documentation is never enough and rarely accommodates enough use cases.
So I decided to create a proof of concept and explain how to integrate Revolut Open API for Business with Node.js.
Revolut API Integration: Main Challenges
Before I go on with describing the step-by-step process, I want to give you a heads-up on what to expect.
As noted above, the documentation for a fairly new integration is not 100% complete. So you usually rely on technical support from customer reps.
When I started integrating Revolut API, I read the documentation and everything seemed straightforward and simple. Which proved not to be the case, since there are differences between what's in the Revolut API documentation and what actually happens. Some issues that hindered the process were:
- The support reps changed often, which led to constant delays and slip-ups.
- The documentation was updated on the fly, without notice from Revolut (i.e. an entire feature was deleted from the documentation).
- I was not assisted by anyone technical from their team, with none of the issues I brought forward.
- The test accounts I used sometimes stopped working.
That's when I figured my experience with this integration could help others navigate it more easily and decided to write this step-by-step tutorial.
1.Setup
First, you need to create a Demo Business Account here. Then, you're on to authentication.
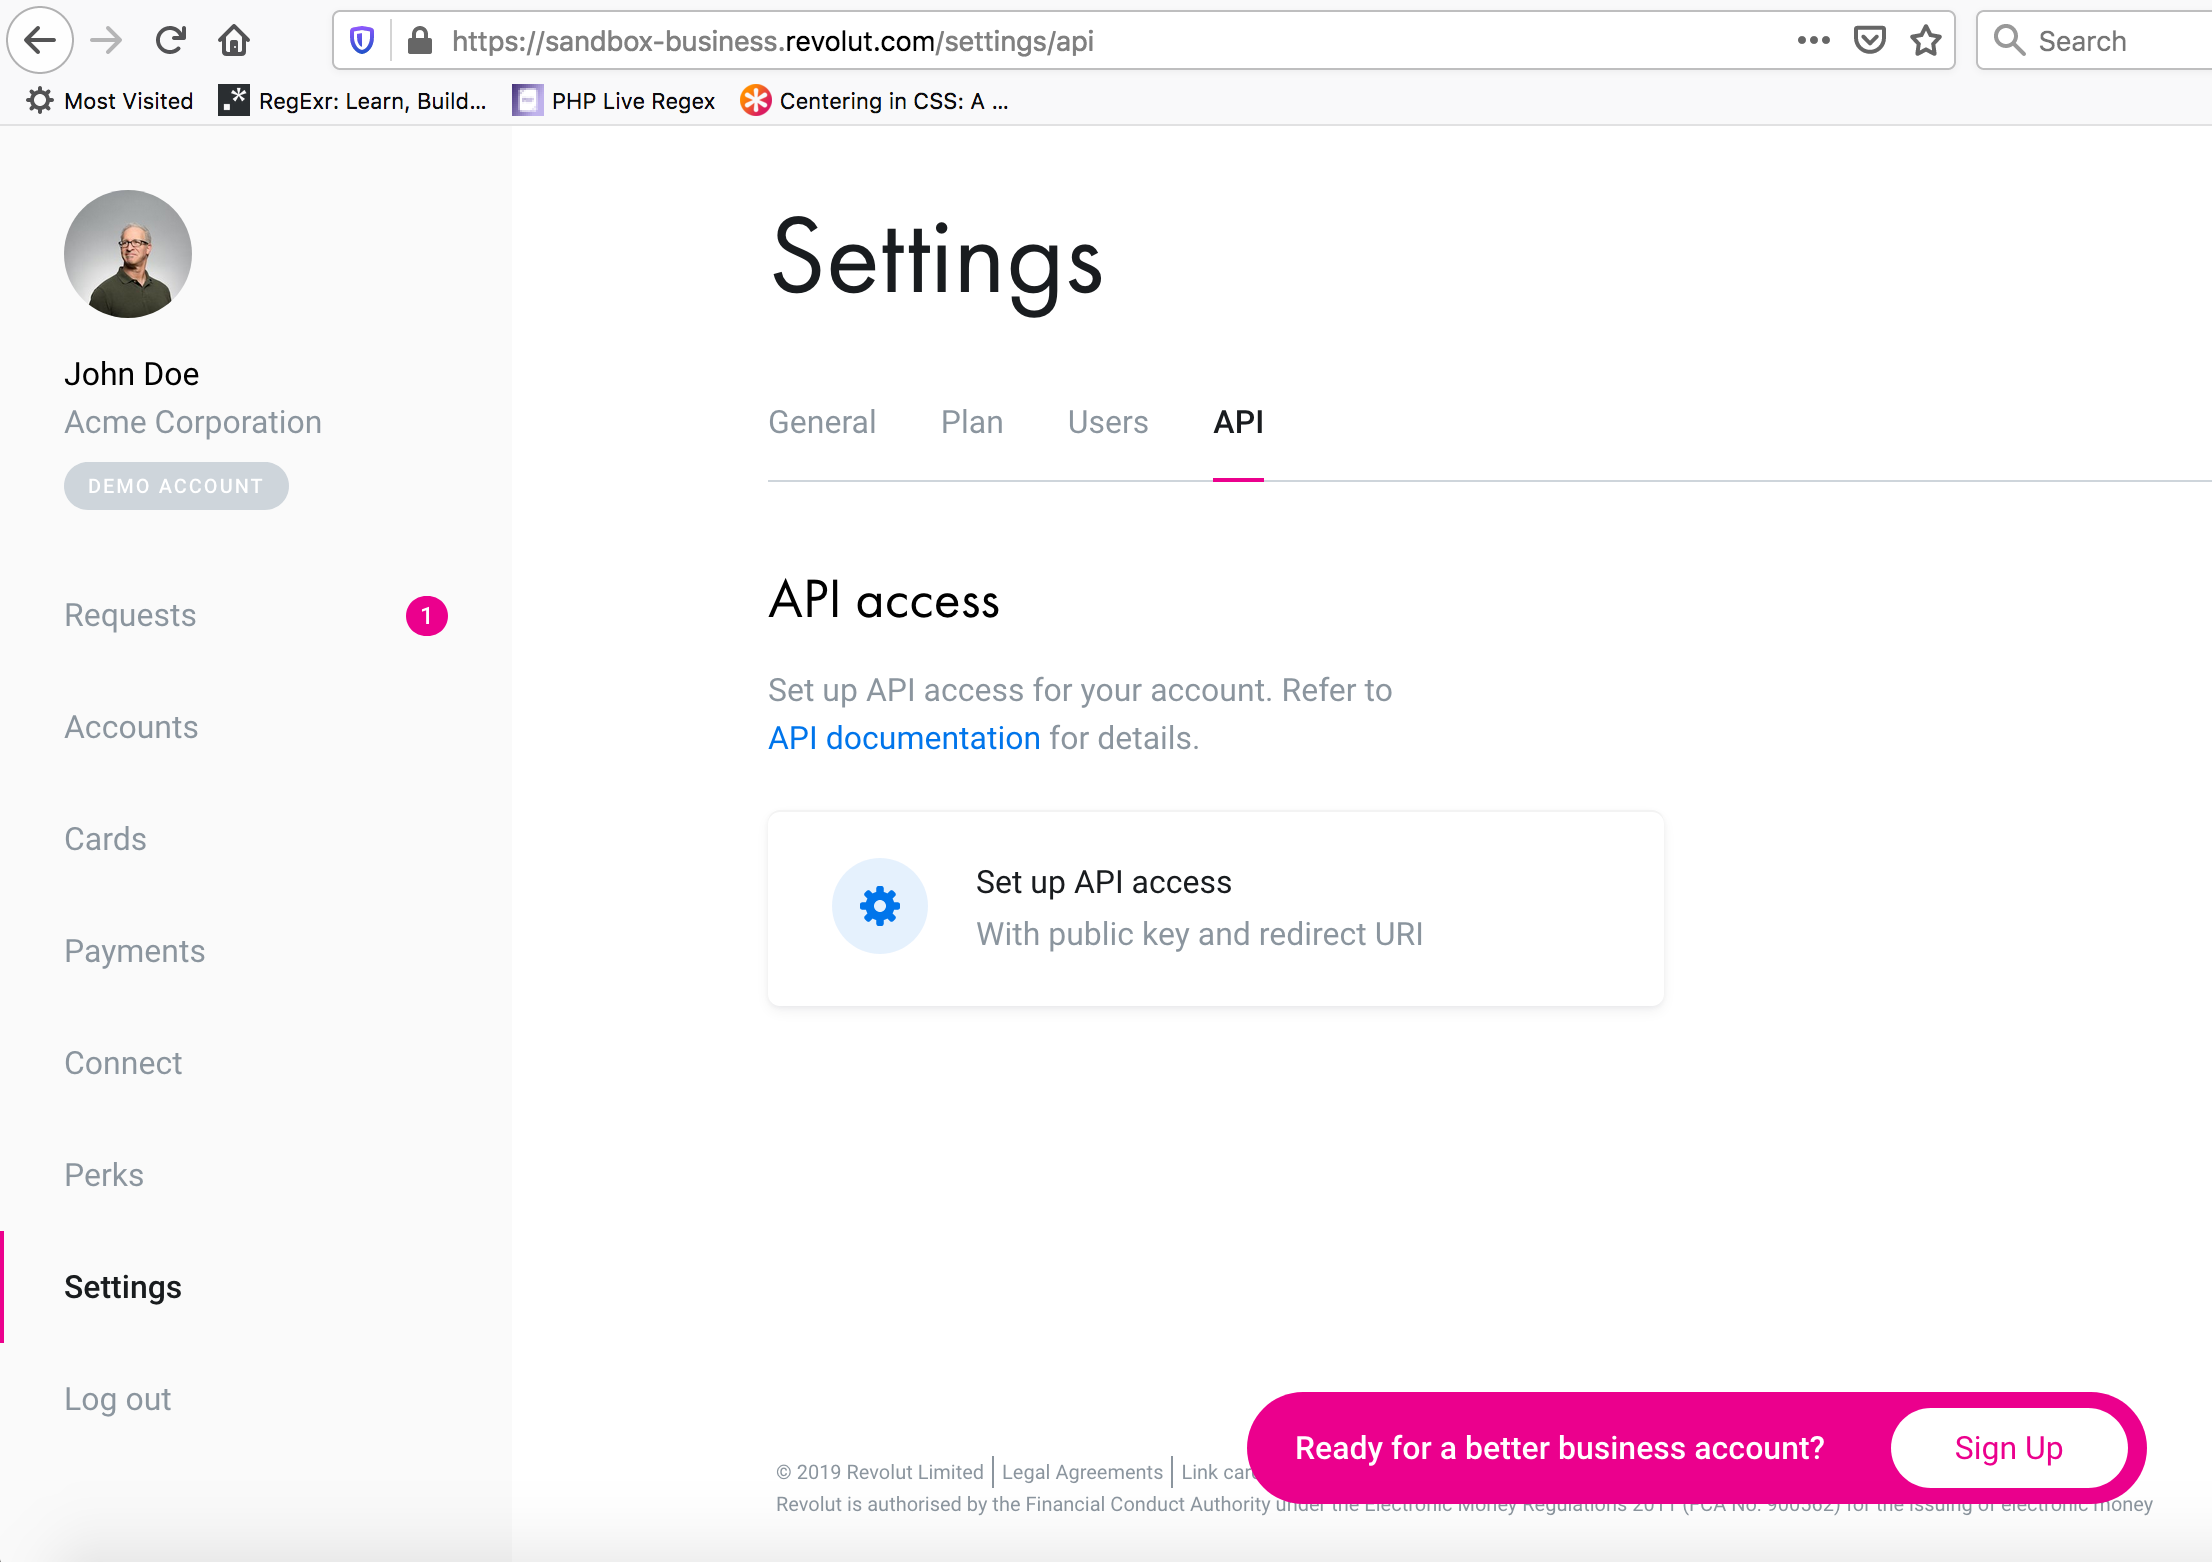
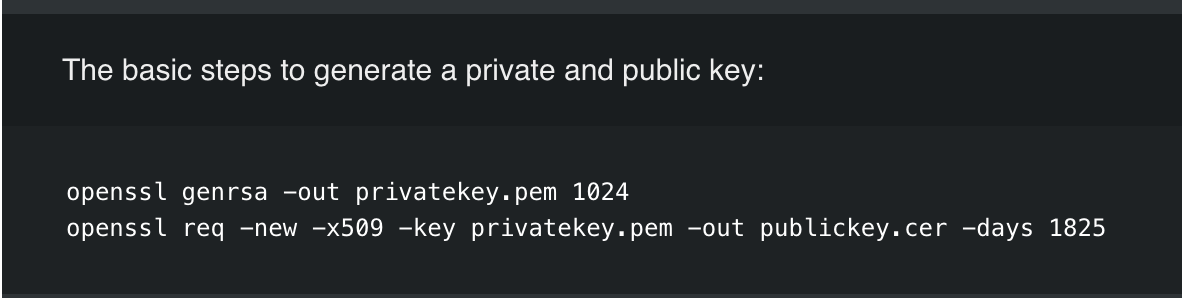
In order to set up the API, you first have to generate a pair of public/private keys.
On the Revolut documentation you can find the commands:
Using the public keys you can set up the API on the Revolut account.
You have to add a route from your project, where you will receive a code that you'll be able to exchange for an access token.
2. Generate JWT
Before clicking 'Enable API access to your account', you have to create a GET endpoint in your project. You will receive a param code. Using that code and a JWT token, you can call the Revolut endpoint to receive the access token.
Like this:
async function generateJWT() {
  let jwtValue = "";

  try {
    const payload = {
      // Issuer for JWT, should be derived from your redirect URL
      iss: Config.revolut.issuer,
      // Your client ID,
      sub: Config.revolut.client_id,
      // Constant
      aud: "https://revolut.com"
    };
    const privateKey = Config.revolut.private_key;

    jwtValue = jwt.sign(payload, privateKey, {
      algorithm: "RS256",
      expiresIn: 60 * 60
    });
  } catch (error) {
    this.error("Got error on generate JWT", error);
  }

  return jwtValue;
}
2.1 Get access token
By using this:
const response = await request
    .post(`${ Config.revolut.api_url }/auth/token`)
    .set('Content-Type', 'application/x-www-form-urlencoded')
    .send({
      grant_type: 'authorization_code',
      code: code,
      client_id: Config.revolut.client_id,
      client_assertion_type: 'urn:ietf:params:oauth:client-assertion-type:jwt-bearer',
      client_assertion: jwtValue
    });
  return response.body;
You should get this response:
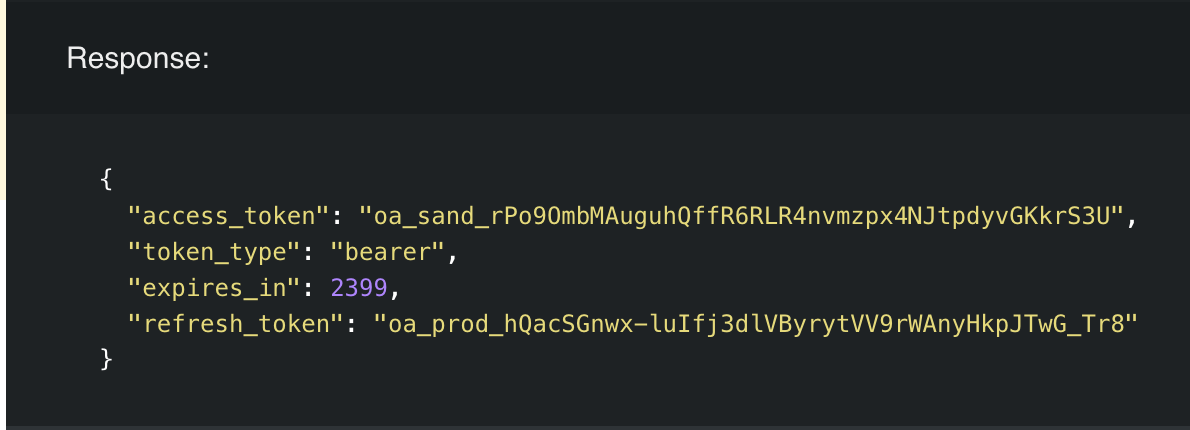
Into the database, we store all this, plus the refresh expire date (today + 90 days). You will see this info in your Revolut account too.
The access_token is valid 40 minutes. After this, you can do a call to Revolut for a new access_token. This call uses the same function to get a valid JWT.
const response = await request
  .post(`${ Config.revolut.api_url }/auth/token`)
  .set('Content-Type', 'application/x-www-form-urlencoded')
  .send({
    grant_type: 'refresh_token',
    refresh_token: refreshToken,
    client_id: Config.revolut.client_id,
    client_assertion_type: 'urn:ietf:params:oauth:client-assertion-type:jwt-bearer',
    client_assertion: jwtValue
  });
return response.body;
Now you are ready to click 'Enable'. If everything works fine you will see:
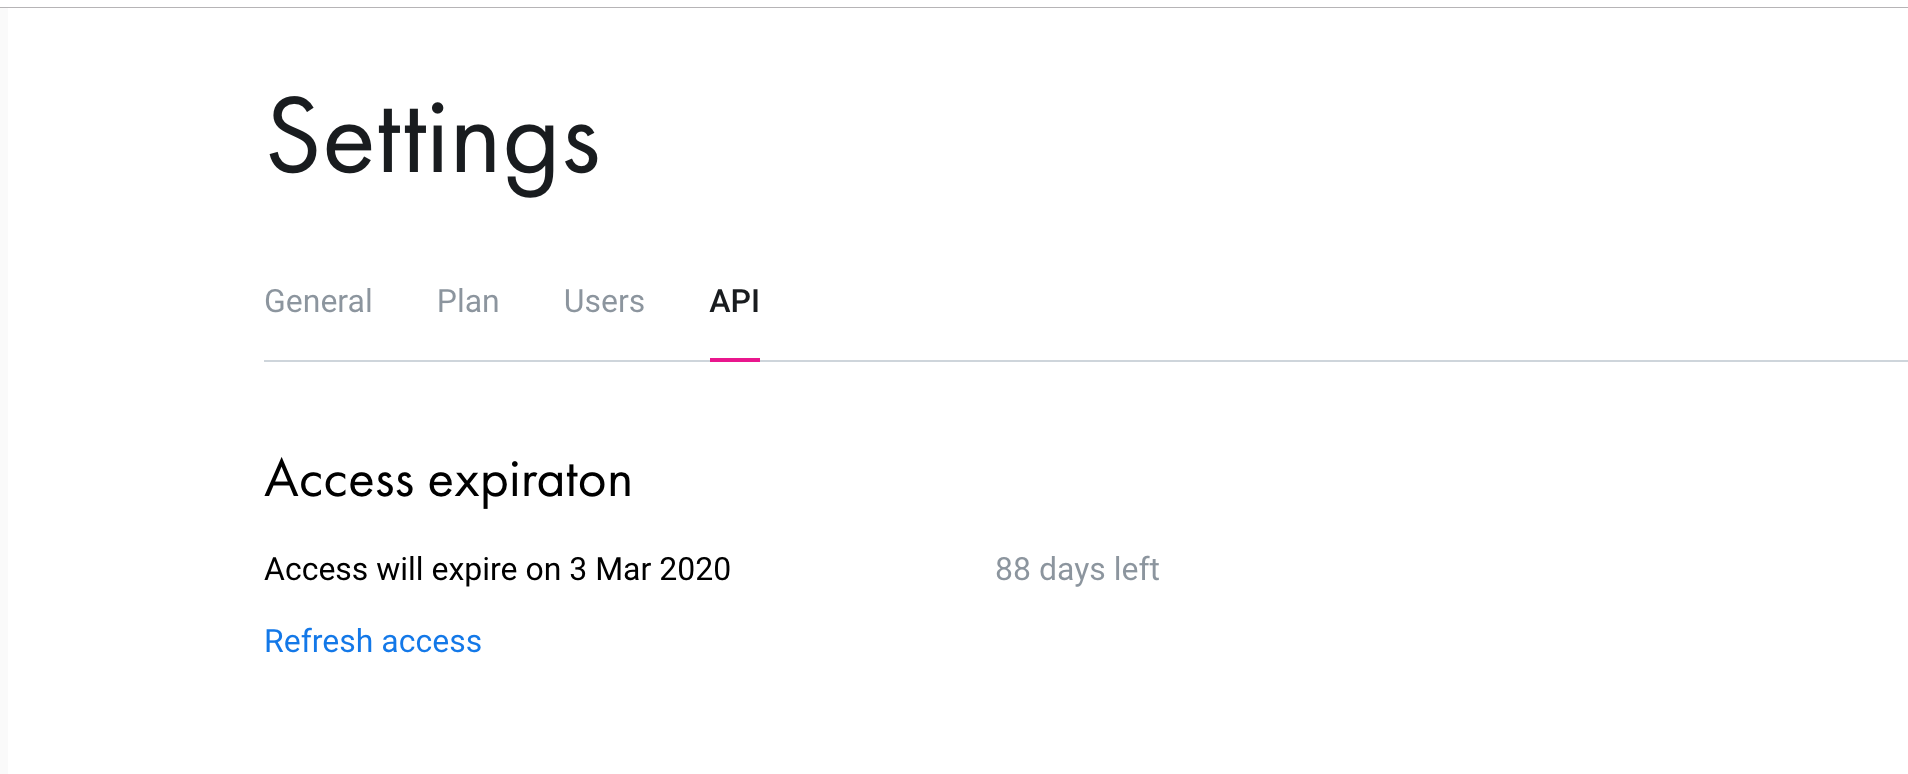
All the endpoints provided by Business Open API are now available.
3. Revolut Endpoints
The next step is building the infrastructure for operating payments (note that, in case of a Revolut-to-Revolut transaction, the payment is instant, while the rest of the payments will undergo a 'pending' state).
For the non-instant transactions, you'll set up payment drafts which - according to the Revolut for Business API documentation - are "payments that are not executed immediately, but need to be approved by a business owner/admin first."
3.1 Accounts
I used this endpoint to get all the accounts and to find the right currency for the payment.
async getAccounts(accessToken) {
  try {
    const response = await request
      .get(`${ Config.revolut.api_url }/accounts`)
      .set('Authorization', `Bearer ${ accessToken }`);

    return response.body;
  } catch (error) {
    this.error('Got error on Revolut Get Accounts request', error);
  }
}
3.2 Add Counterparties
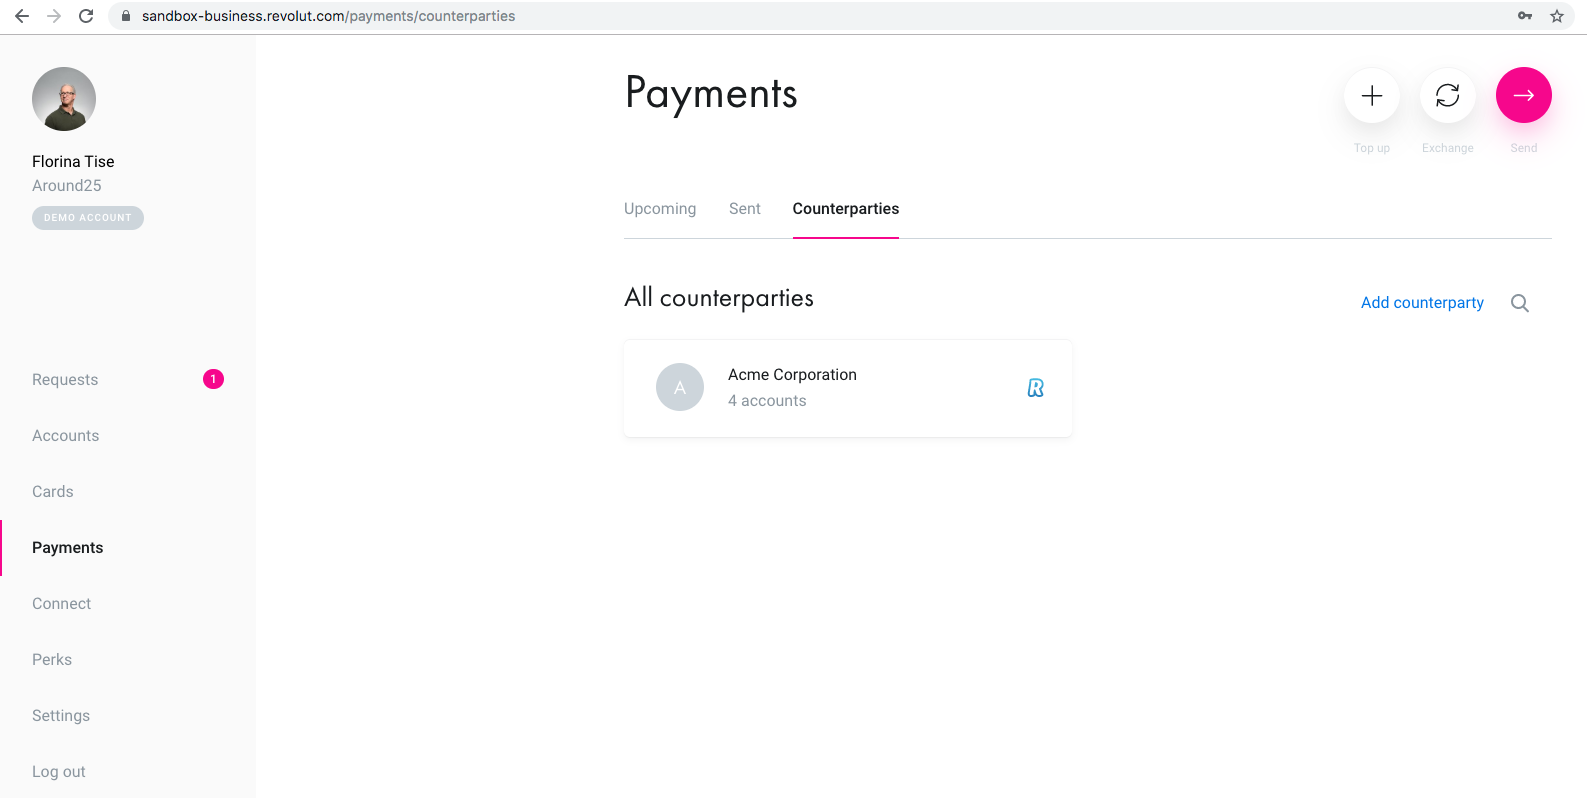
Before enabling a Revolut user to make any operations, you have to set it as a counterparty. A counterparty defines the other end of a transaction (e.g. a buyer is the counterparty to a seller).
In Revolut for business, there are two types of users: Business and Retail. Based on the type, you have to send different information when you call the POST to Revolut.
let data = {
    profile_type: revolutProfile.type
};

if (revolutProfile.type === REVOLUT_BUSINESS) {
  data.email = revolutProfile.email;
} else {
  data.name = revolutProfile.name;
  data.phone = revolutProfile.phone;
}

try {
  const response = await request
    .post(`${ Config.revolut.api_url }/counterparty`)
    .set('Authorization', `Bearer ${ accessToken }`)
    .send(data);

  return response.body;
} catch (error) {
  this.error(error);
  // ...
}
For the business type, you only have to add the email, while for the retail type you need the name and the phone. You will get the counterparty ID and other information about the user.
You have to store the counterparty ID to be able to use it in other endpoints (creating payments, for example).
You will see these counterparties on the Revolut account too.
Note that at this point you might encounter an issue.
If the counterparty is already added, you will receive an error (code = 3012) when you try to add it again. But this time, you don’t get the counterparty ID. So if you need it, you have to do another call that retrieves all your counterparties and filters them based on the Revolut type and the profile info (email or name and phone).
3.3 Get Counterparties
Use this to return an array with counterparty objects:
async getCounterparties(accessToken) {
  try {
    const response = await request
      .get(`${ Config.revolut.api_url }/counterparties`)
      .set('Authorization', `Bearer ${ accessToken }`);

    return response.body;
  } catch (error) {
    this.error('Got error on revolut Get Counterparties request', error);
  }
}
3.4 Get Counterparty
I used this endpoint to find in which account ID (based on the currency) I should create a payment draft.
async getCounterpartyById(counterpartyId, accessToken) {
  try {
    const response = await request
      .get(`${ Config.revolut.api_url }/counterparty/${ counterpartyId }`)
      .set('Authorization', `Bearer ${ accessToken }`);

    return response.body;
  } catch (error) {
    this.error('Got error on Revolut GET Counterparty', error);
  }
}
3.5 Payment Drafts
When you want to create a payment draft you have to know the from and to inputs.
From designates the currency and the account ID (which I described above in ‘3.1 Accounts’).
To will call a counterparty. So in order to configure it, you have to know the counterparty_id (which you get when you add that counterparty - see ‘3.2 Add Counterparty’ above) and the account_id (see headline ‘3.4 Get Counterparty’).
Reference is also important. You can generate a unique value for each payment. We will use this value to map the payment when you have to use the GET Transaction Revolut endpoint without knowing the payment ID.
async paymentDrafts(pay, from, to) {
  try {
    const response = await request
      .post(`${ Config.revolut.api_url }/payment-drafts`)
      .set('Authorization', `Bearer ${ from.access_token }`)
      .send({
        title: pay.title,
        payments: [
          {
            currency: pay.currency,
            amount: pay.amount,
            account_id: from.account_id,
            receiver: {
              counterparty_id: to.counterparty_id,
              account_id: to.account_id,
            },
            reference: pay.reference
          }
        ]
      });

    return response.body;
  } catch (error) {
    this.error('Got error on revolut Pay request', error);
  }
}
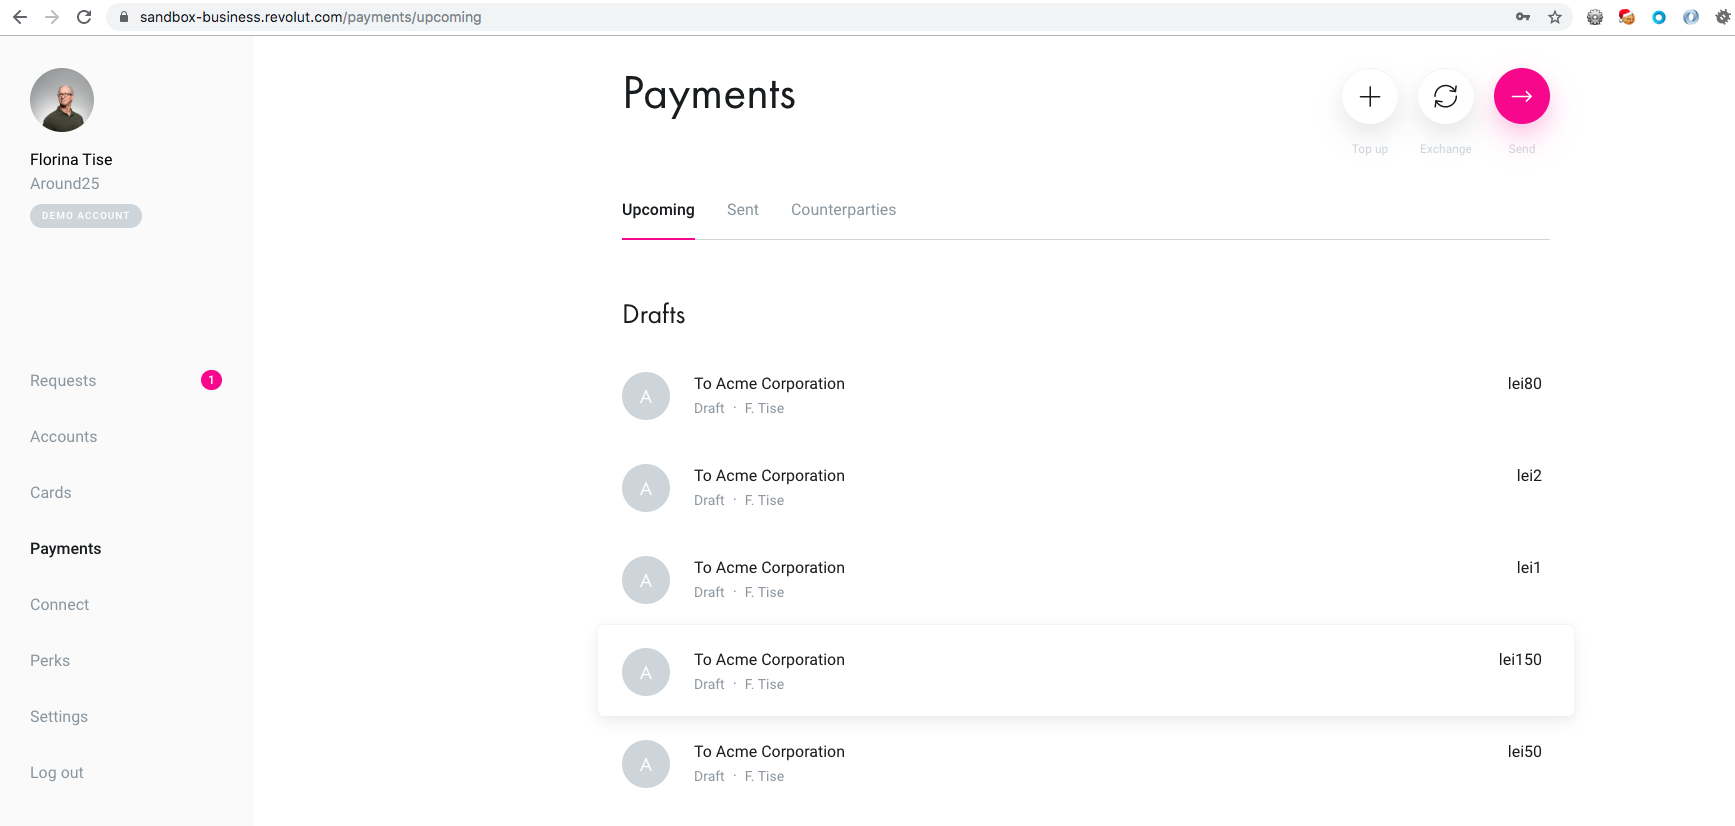
This retrieves the payment draft ID. You have to store it into the database to be able to use it in other calls.
The end users will see these payments and will be able to decide whether to approve them or not.
3.6 Get Payment Draft by ID
To update the payments status from the database, you can create a cron running at a certain interval to check all pending payments.
Revolut offers a webhook system to receive updates about you account, but for me it didn’t work (and their support wasn't responsive with this issue, so I guess we'll have to wait and see if they fix it).
So my solution was to use the Get Payment Draft By ID endpoint.
Here, you might experience one issue. If the payment is deleted you will receive an error (code = 3070). So I checked this code and I updated the status in database.
async getPaymentDraft(accessToken, id) {
  try {
    const response = await request
      .get(`${ Config.revolut.api_url }/payment-drafts/${ id }`)
      .set('Authorization', `Bearer ${ accessToken }`);

    return response.body;
  } catch (error) {
    this.error(error);

    if (!('response' in error && 'text' in error.response)) {
      return null;
    }

    const errorText = JSON.parse(error.response.text);
    // check if payment is deleted
    if (('code' in errorText) && (errorText.code === REVOLUT_PAYMENET_DRAFT_NOT_FOUND_CODE)) {
      return {
        isDeleted: true,
        error: errorText,
      };
    }

    this.error('Got error on Revolut get PAYMENT DRAFT', error);
  }
}
3.7 Get Transactions
I used this endpoint to update the deposit payments (payments that are created from a Revolut user to you).
Then I created a cron running at a certain interval to get all transactions. Based on the ref_id, you can update the status in the database.
async getTransactions(accessToken) {
  try {

    const from = moment().subtract(2, 'days').format('YYYY-MM-DD');
    const to = moment().format('YYYY-MM-DD');

    const response = await request
      .get(`${ Config.revolut.api_url }/transactions?type=transfer&from=${ from }&to=${ to }`)
      .set('Authorization', `Bearer ${ accessToken }`);

    return response.body;
  } catch (error) {
    this.error('Got error on Revolut Delete a web-hook', error);
  }
}
As mentioned above, Revolut's webhook system didn't work for me, so that's why I used this method to update transactions.
Integrating Revolut for Business Open API: Conclusions
Before integrating Revolut, I thought their Open API for Business was more stable. Turns out, it needs some improvements - especially on the technical support side.
So if you're looking to use this API, I hope my article helped you grasp all the steps of the process (reach out to me in the comments section for further details if needed). And if you have experience integrating payment services - or even Revolut, for that matter - feel free to share your observations below.